Pops, crackles or other types of distortion noises are common issues with regards to buffer sizes in FL Studio. Fortunately, there is often a relatively simple way to fix this problem.
In this case with FL Studio, it appears that the unwanted noises were being caused by a buffer size setting. Some DAWs have “smart” settings with regards to buffer sizes, which means the DAW will try to adjust buffer sizes automatically, in order to simplify workflow. While this can be convenient for some plug-ins, other more intensive plug-ins that use slightly more complicated algorithms require an increased buffer size.
In FL Studio, the solution is to use a fixed size buffer. Here are the steps, with accompanying illustrations, explaining the process.
For Windows and Mac users, the look of certain steps is slightly different, but the overall process in the same. But just in case, we will outline both processes separately.
PLEASE NOTE: The following setting is NOT global. It will be saved individually per plug-in and it will be recalled next time when you run FL Studio so it only need to be set once – per plug-in.
For Windows users:
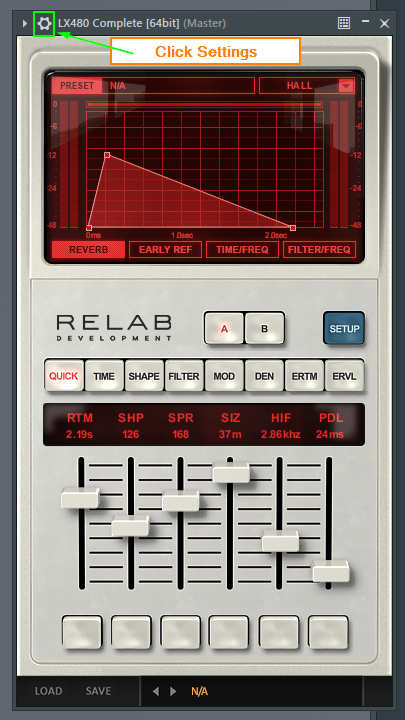
Step 1: Open the LX480 plug-in, and click on the “settings” wheel in the top left corner.
Step 2: Within the “settings” window, you will see two icons…one is a “plug” icon, the other is a combination of a “plug and settings wheel” icon. Click this second icon.
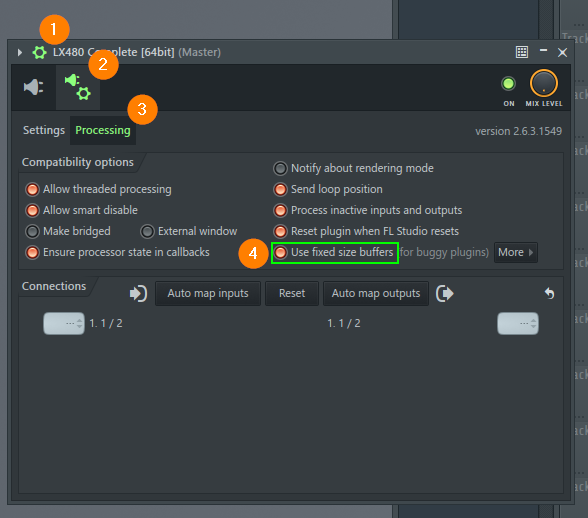
Step 3: After clicking this second icon, you will see 2 options…”Settings” and “Processing”. Choose “Processing”. Under “Processing”, you will find a list of “Compatibility Options”.
Step 4: In the “Compatibility Options” list, make sure that “Use fixed size buffers” is selected, and then choose the buffer size that best suits your computer’s processing power.
For Mac users:
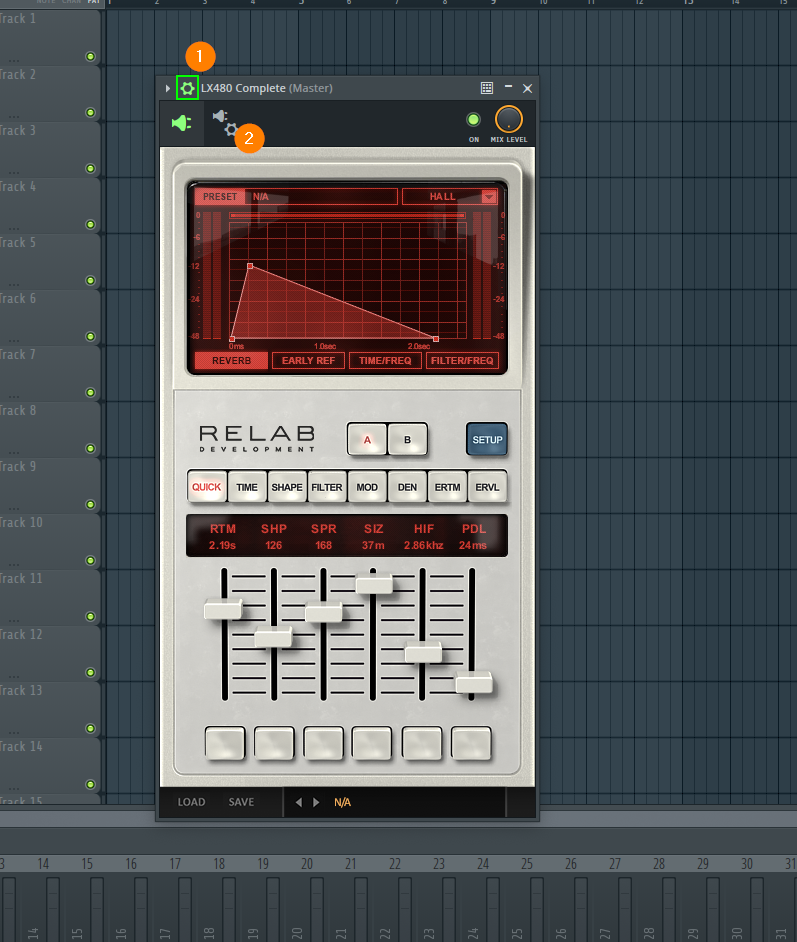
Step 1: Open the LX480 plug-in, and click on the “settings” wheel in the top left corner. This action will create a small pull-down menu with 2 icons. The first icon is a “plug”, and the second is a combination of a “plug and settings wheel” icon. Click this second icon.
Step 2: After clicking the “plug and settings wheel” icon, a settings window will open with 3 options…”Settings”, “Processing” and “Troubleshooting”. Choose “Troubleshooting”.
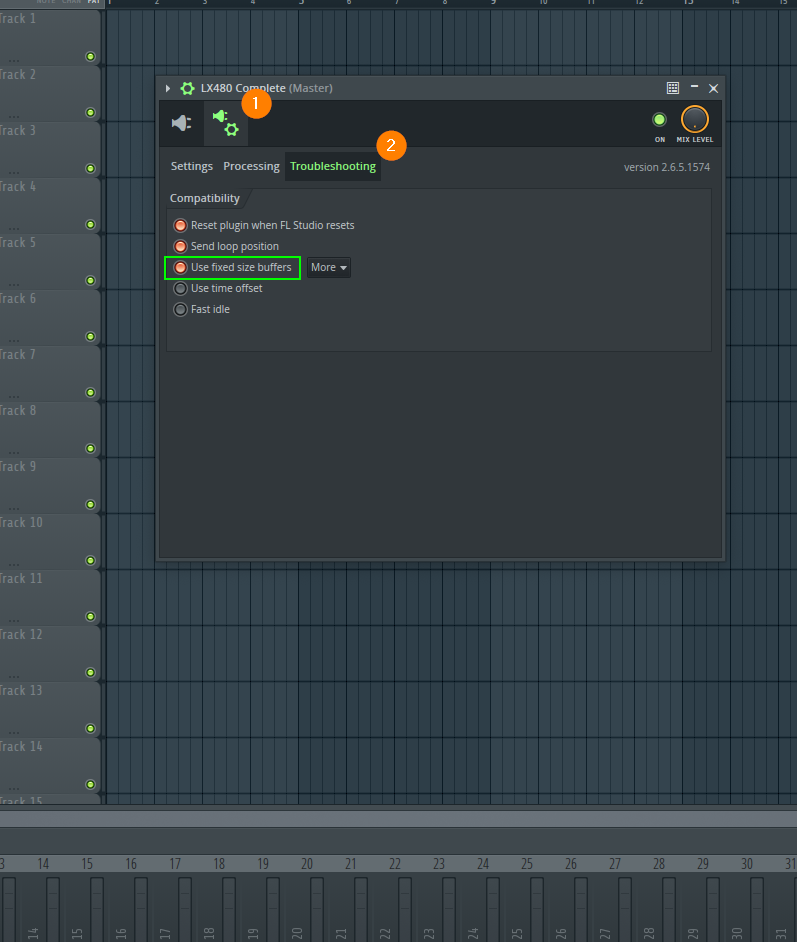
Step 3: Within “Troubleshooting”, you will find a list of “Compatibility” options. Make sure that “Use fixed size buffers” is selected, and then choose the buffer size that best suits your computer’s processing power.
Note: If you continue to experience any crackling, pops or audio distortion while using the LX480 plug-in, please feel free to contact us directly here, and our support team will be happy to help you diagnose and solve the issue.